Cashfree is a payment gateway that allows merchants to accept payments online from customers through a variety of payment methods including debit cards, credit cards, netbanking, UPI, and wallets.
With Cashfree, merchants can easily set up payment pages on their website or integrate Cashfree’s API into their website or mobile app to enable online payments.
So, To integrate Cashfree’s payment gateway in a React.js application, you will need to follow these steps:
The integration can be completed in three steps:-.
- Create Order (Step 2 in the image below)
- Pay Order (Step 3 in the image below)
- Handle redirection and confirm order status (Step 5 in the image below)

To process any payment on Cashfree PG, you need to create an order in the cashfree system. This order will be created via an api call. After successful order creation youwill receive “payment_session_id” in response object which you will have to use in our javascript checkout sdk to redirect to cashfree checkout page.
So to create an order we need the following request payload :-
There are two objects in the above payload which require some more context — customer_details and order_meta which we send in create order api.
- customer_details:- Customer_id, email, orgid, cutomer_mobile (These attributes may vary from application to application)
- order_meta-The meta object can be used to control payment behavior. You can customize the payment options available to the customer for this order and also configure the webhook endpoint.
- return_url-For payments that use redirection, this is the return url. Customers who pay with a card get redirected from your website to the bank’s OTP page. The customer will then redirected back to your website, where the placeholder “order id” must be present. Cashfree will automatically update these placeholders with the real value for that order when referring the customer back to the return url from the bank’s OTP page.
So, if you have provided a return_url of the format — https://testscalar.com?order_id={order_id} — the customer will be redirected to the url — https://testscalar.com?order_id=order_271vfuhh1o4h6bQIigqyOx74YiJ1T
- notify_url-The webhook url is necessary to obtain successful or unsuccessful webhooks following the completion of an order’s payment.
- payment_methods-List of payment modes available.
Use the following values — cc, dc, ccc, ppc, nb, upi, paypal, emi, app paylater.
So, if you want to accept only debit cards and UPI from customers, you must pass the following value — “dc, upi”.
Response
If the order creation is successful you will receive a 201 response status code and the payment session id in response which we will use in our javascript checkout sdk to redirect to cashfree checkout page.
Pre-built Checkout Page
So, You can see the pre-built checkout page that cashfree provides and to use a pre-built checkout page, then you just need to use our javascript sdk which will redirect the customer to the standard checkout page
Javascript SDK
Once you receive payment_session_id from create order response, you just need to use Cashfree’s JS SDK
So, Cashfree’s JS SDK supports two different environments
Sandbox environment: You can use this environment for testing. No actual debit amount occurs. Everything will be simulated. By using this environment you can integrate the SDK, accept payments, etc.
For eg in sandbox environment you will be getting dummy Test cards which will act like real credentials and also the OTP which again you can stimulate for success and failure for testing purpose.


These are the steps you have to follow to include and integrate SDK:-
Step 1: Include our SDK in your client code
For Sandbox Environment(Testing Environment)
[JavaScript] [JavaScript]For Production Environment
[JavaScript] [JavaScript]Step 2: Initialize the SDK
[JavaScript] const paymentSessionId = “your payment session id”; const cashfreeSDK = new window.Cashfree(paymentSessionId); [JavaScript]Step 3: Redirect to checkout
You would be using redirect function to redirect to pre-built checkout page.
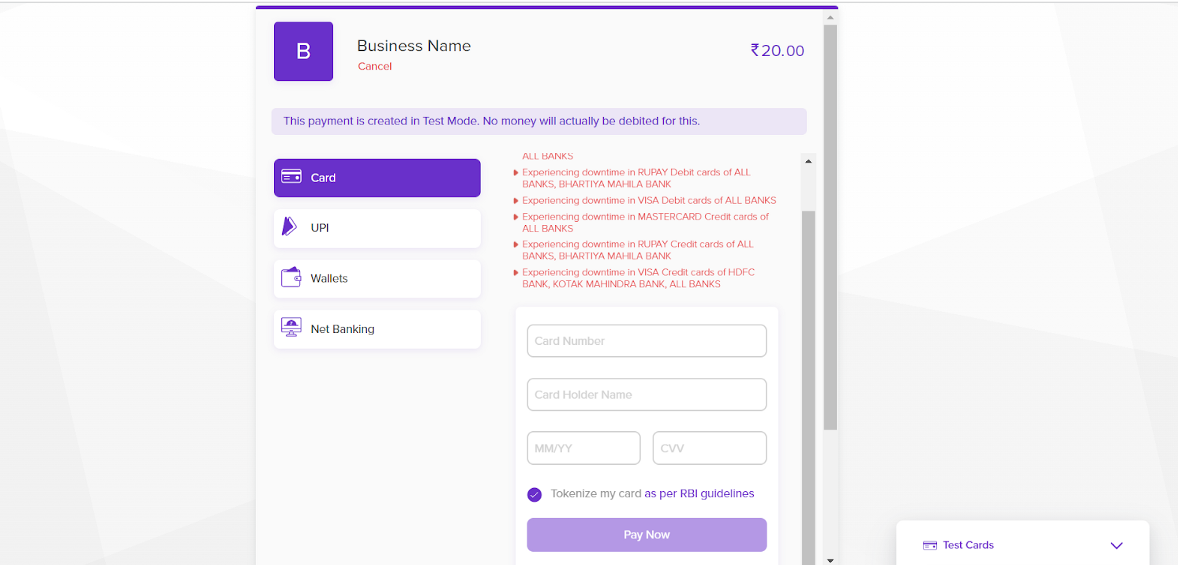
[JavaScript] cashfreeSDK.redirect(); [JavaScript]Once you have successfully created the order, you can use the order to initiate payment. You will be redirected to cashfree payment gateway (just like the ss below)

Handle Return URL and Confirm Status of your Order
Once the customer enters the OTP on the payment page, they will return back to the return url.
In case the customer is redirected from your website to a third party page, you would also want them to return back to your application. The return_url provided in the create order API call is used for this. So, when user returned back to website then the last step is to check the status of the order in Cashfree’s system and update the order at your end. You can do it through a simple GET Api request Call where your backend will give you the status about your order.
Remember, Make sure that you always check the order status when you returned back to your website. The order_status can be one of ‘PENDING’, ‘FAILED’, ‘USER_DROPPED’,’ SUCCESS’, ‘CANCELED’. You have to fetch the order status from your backend using the /orders/:orderID API call and can show your order status on your screen.
Hope this article is helpful for you and you must have learned now how to integrate cashfree payment gateway in react js.
Keep Learning & Keep Growing
