In this article, we’ll learn how to secure our spring boot API using Firebase authorization.
Introduction to Firebase Authentication
It is essential to authenticate users, and it is much harder if we have to write all this code on our own. This is done very easily with the help of Firebase. Firebase Authentication provides backend services, easy-to-use SDKs, and ready-made UI libraries to authenticate users to your app. It supports authentication using passwords, phone numbers, and popular federated identity providers like Google, Microsoft, Facebook, Twitter, and more.

How Authentication Works..?
We first get authentication credentials from the user to sign a user into our app.
- Credentials can be the user’s email address and password.
- The credential can be an OAuth token from an identity provider.
We then pass these credentials to the Firebase Authentication SDK. Backend services will then verify those credentials and return a response to the client.

And after a successful sign in-
- Firebase provides us with an authentication token, which is then checked in whatever place we need to authenticate or authorize a user, be it front-end or back-end.
- We can access the user’s basic profile information.
Prerequisites
- Make sure that you have a server app.
- Admin Java SDK — Java 8+
Let’s get started:
Configure Firebase
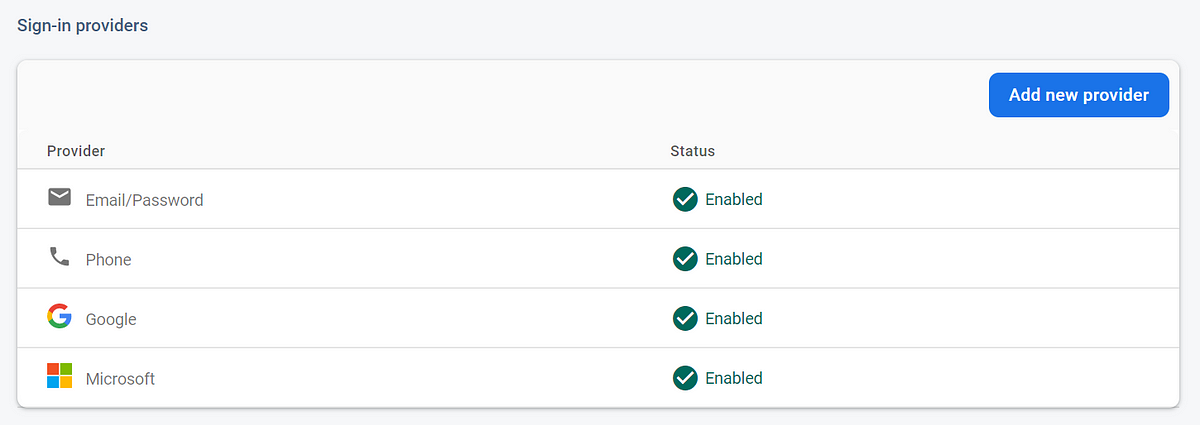
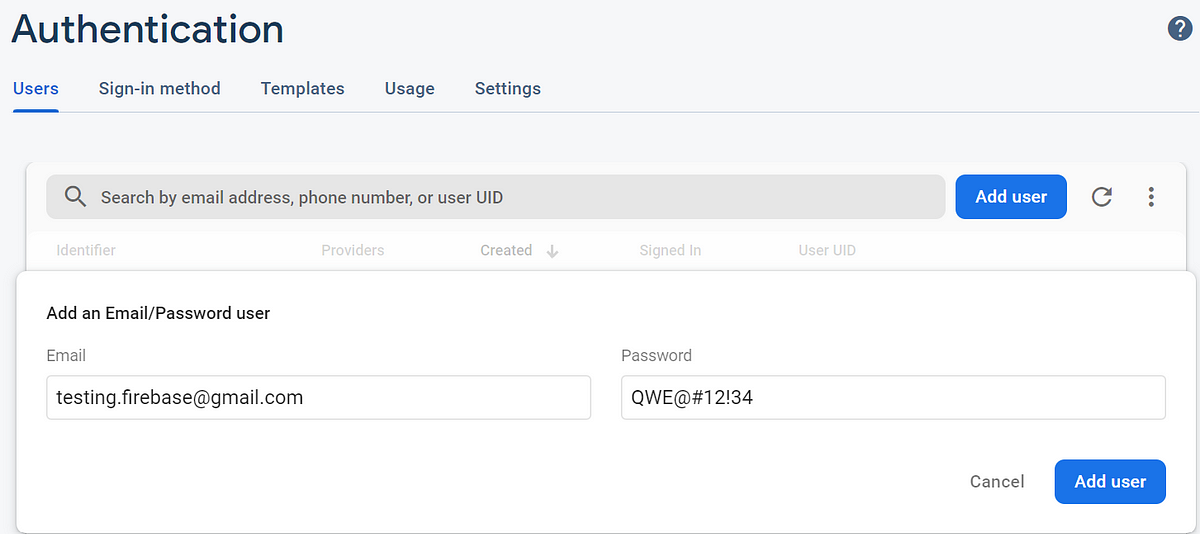
First, enable the SignIn Method. I enable Email/Password and Google and create a user. You can simply add a user using email/password.

Configuring Firebase in Spring Boot Project
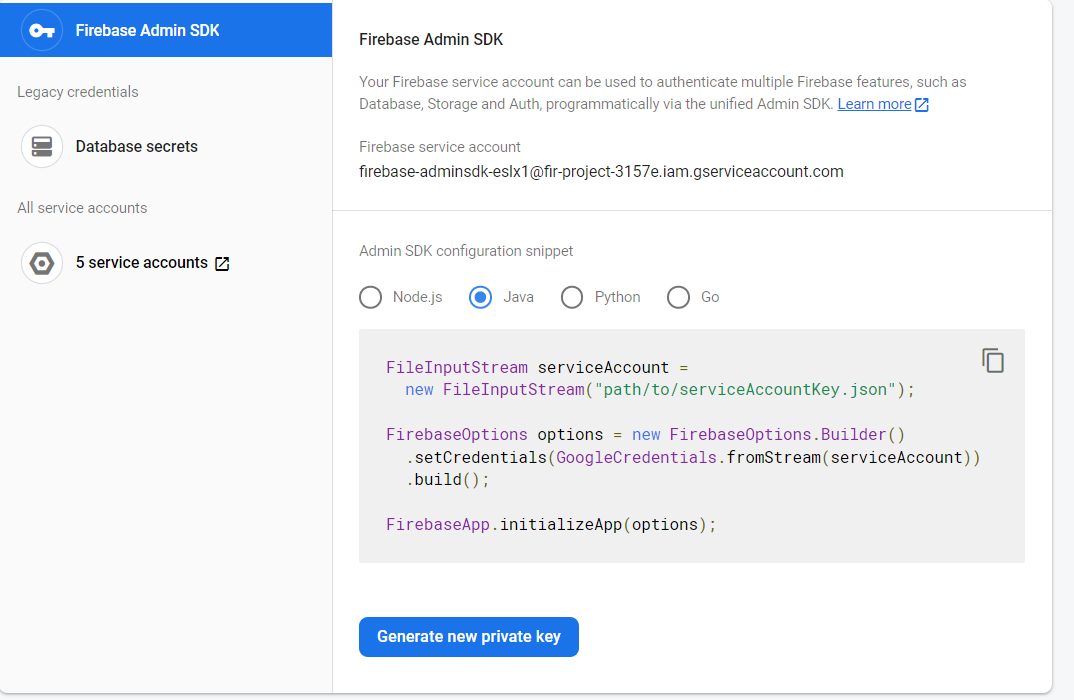
To configure the Firebase in the spring boot project first download the servicesAccountKey.json file from your Firebase Project setting.
Go to Project Setting -> Service Account-> Scroll down and click on Create and then click on Generate new Private Key.
This will generate and download Private Key to access the Firebase Admin SDK.
*make sure to keep this file secure

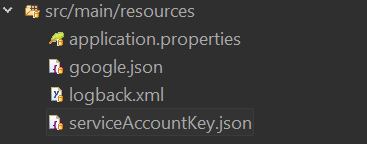
Download the servicesAccountKey.json file and paste it into the resource folder of your spring boot project. This is the location where we access our private key.

Add the SDK
If you are setting up a new project, you need to install the SDK for the language of your choice. If you use Maven to build your application, you can add the following dependency to your pom.xml:
for reference, you can visit
https://firebase.google.com/docs/admin/setup#windows
Retrieve ID tokens on clients
When a user or device successfully signs in, Firebase creates a corresponding ID token that uniquely identifies them and grants them access to several resources, such as Firebase Realtime Database and Cloud Storage. You can re-use that ID token to identify the user or device on your custom backend server. To retrieve the ID token from the client, make sure the user is signed in and then get the ID token from the signed-in user:
firebase.auth().currentUser.getIdToken(/* forceRefresh */ true).then(function(idToken) { // Send token to your backend via HTTPS // … }).catch(function(error) { // Handle error });Once you have an ID token, you can send that JWT to your backend and validate it using the Firebase Admin SDK, or using a third-party JWT library if your server is written in a language that Firebase does not natively support.
Initialize Firebase SDK
//firebase service account @Configuration public class FirebaseInitialization { @Bean public void initialization() { try{ FileInputStream serviceAccount = new FileInputStream(“./serviceAccountKey.json”); // serviceAccountKey.json file containing the key, store this json file to your resource folder FirebaseOptions options = new FirebaseOptions.Builder() .setCredentials(GoogleCredentials.fromStream(serviceAccount)) .build(); FirebaseApp.initializeApp(options); } catch (Exception error) { error.printStackTrace(); } } }Verify ID tokens using the Firebase Admin SDK
The Firebase Admin SDK has a built-in method for verifying and decoding ID tokens. If the provided ID token has the correct format, is not expired, and is properly signed, the method returns the decoded ID token. You can grab the uid of the user or device from the decoded token.
Follow the Admin SDK setup instructions to initialize the Admin SDK with a service account. Then, use the verify token() method to verify an ID token:/ idToken comes from the client app
HTTP filter to check Firebase token
public class FireBaseTokenFilter extends OncePerRequestFilter { /** * Authenticating user via fireBase authorizer verify Firebase token and extract * Uid and Email from token */ @Override protected void doFilterInternal(HttpServletRequest request, HttpServletResponse response, FilterChain chain) throws ServletException, IOException { //Extracts token from header String token = request.getHeader(“Authorization”); //checks if the token is there if (token == null ) throw new ResponseStatusException(HttpStatus.UNAUTHORIZED,”Missing token!”); FirebaseToken decodedToken = null; try { //verifies token to firebase server decodedToken = FirebaseAuth.getInstance().verifyIdToken(token); } catch (FirebaseAuthException e) { throw new ResponseStatusException(HttpStatus.UNAUTHORIZED,”Error! “+e.toString()); } //if token is invalid if (decodedToken==null){ throw new ResponseStatusException(HttpStatus.UNAUTHORIZED,”Invalid token!”); } //Extract Uid and Email String uid= decodedToken.getUid(); String email = decodedToken.getEmail(); /* //set Uid and Email to request void setAttribute(java.lang.String name, java.lang.Object o) */ request.setAttribute(“uid”, uid); request.setAttribute(“email”,email); chain.doFilter(request,response); } }This is how we can authenticate any user in our spring boot application using Firebase.
Thanks for reading!
