There are two possible ways through which we can access Google APIs in our application:
- Using OAuth 2 Consent
- Using Service Account
In the first method, we can call Google APIs on behalf of end users, and in this, user consent is required. On the other hand, in the second method, we can call Google APIs on behalf of the service account and no user consent is required.
Now, suppose our use case is to access Google Calendar events of any employee of our organization from the backend without requiring any user interaction, then we need to go with the service account method. A service account is basically an account that belongs to our application instead of any end user and our app will be called a calendar API without the need of the user.
Flow of Approach:

Step1: Create a google cloud project on the GCP console:
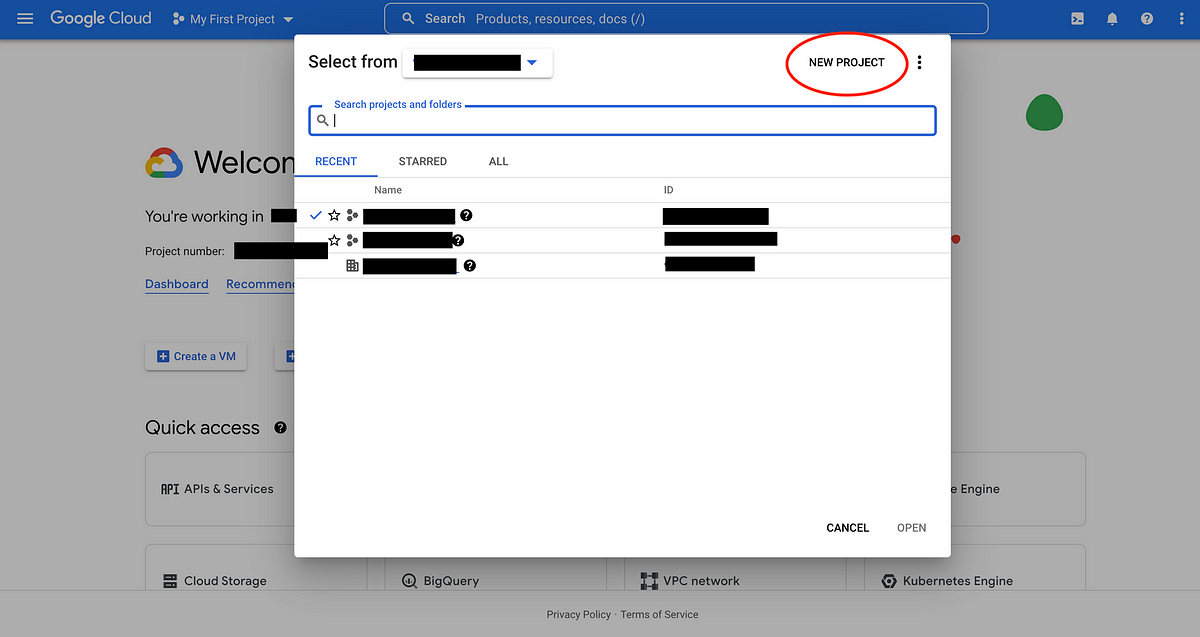
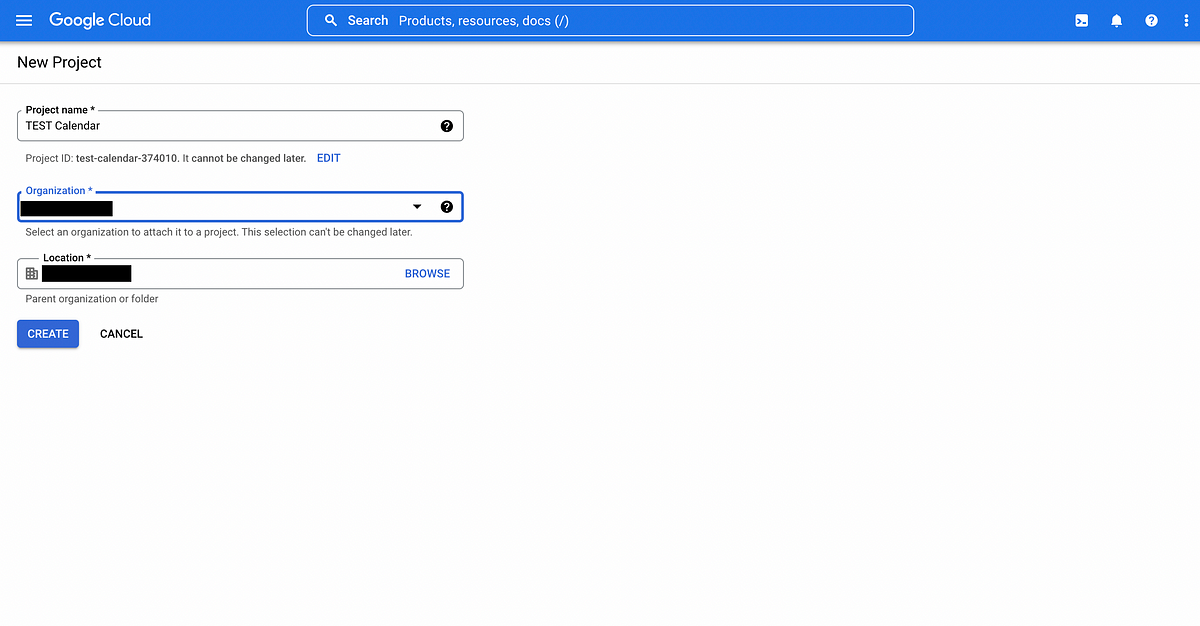
a) Go to the GCP console, and click on the project dropdown. Click on NEW PROJECT on the top right of the opened window. Give the name of the project and then click on Create.
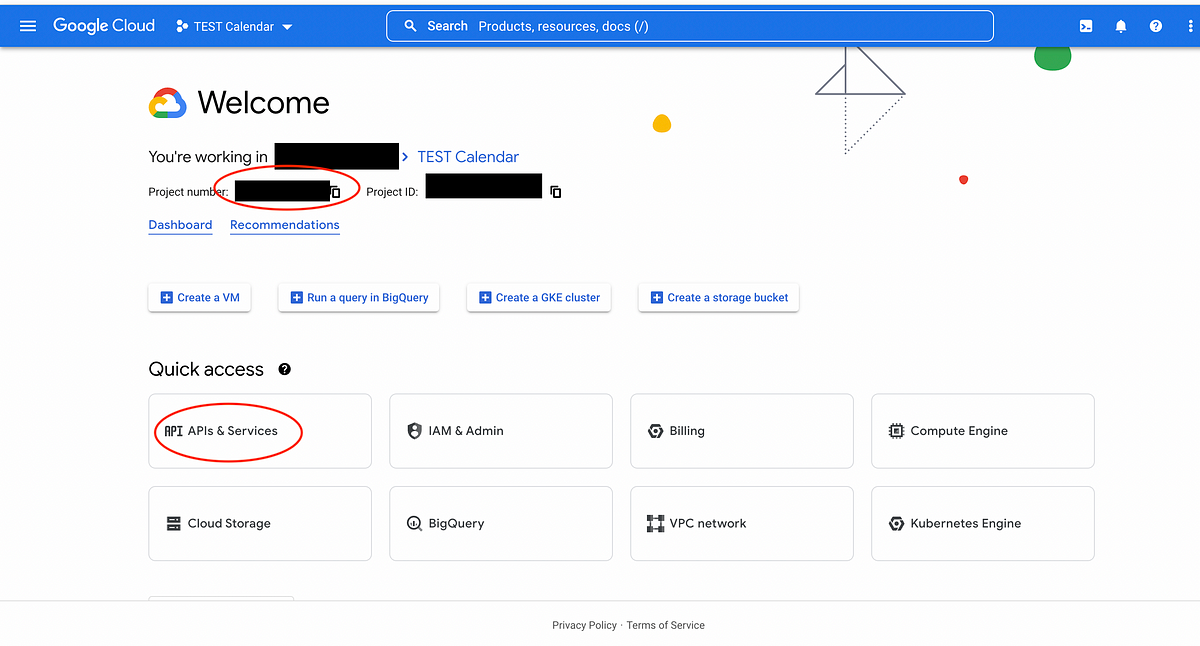
b) Now select the APIs & Services option under Quick Access on the google console dashboard of the newly created project. Also, copy the project number and save it for future use.
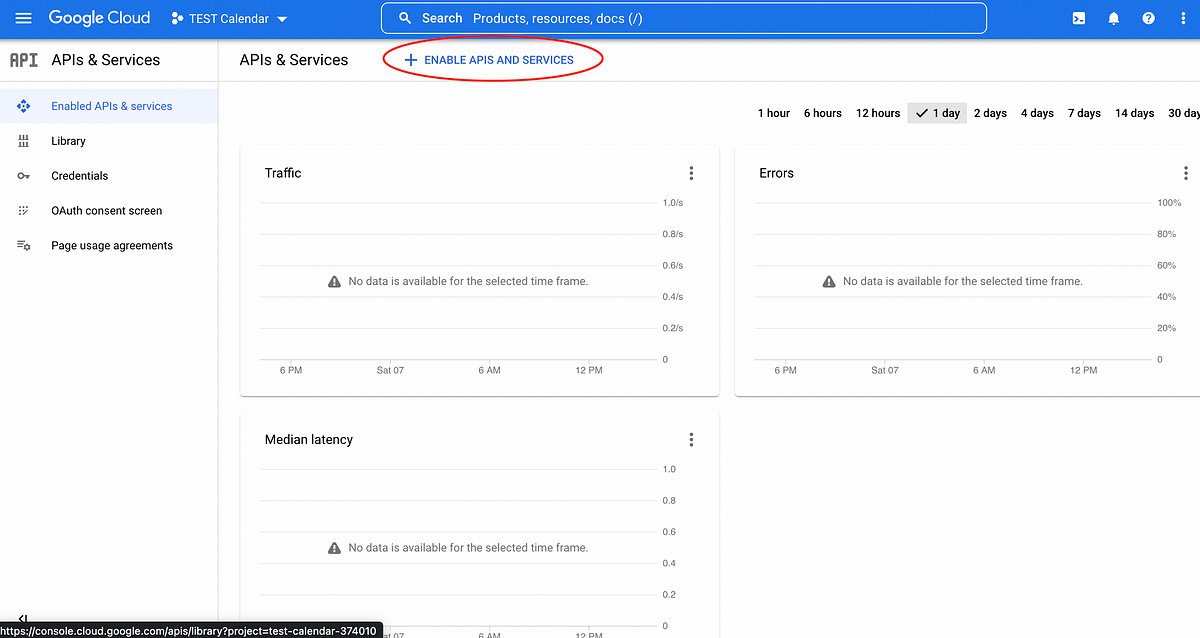
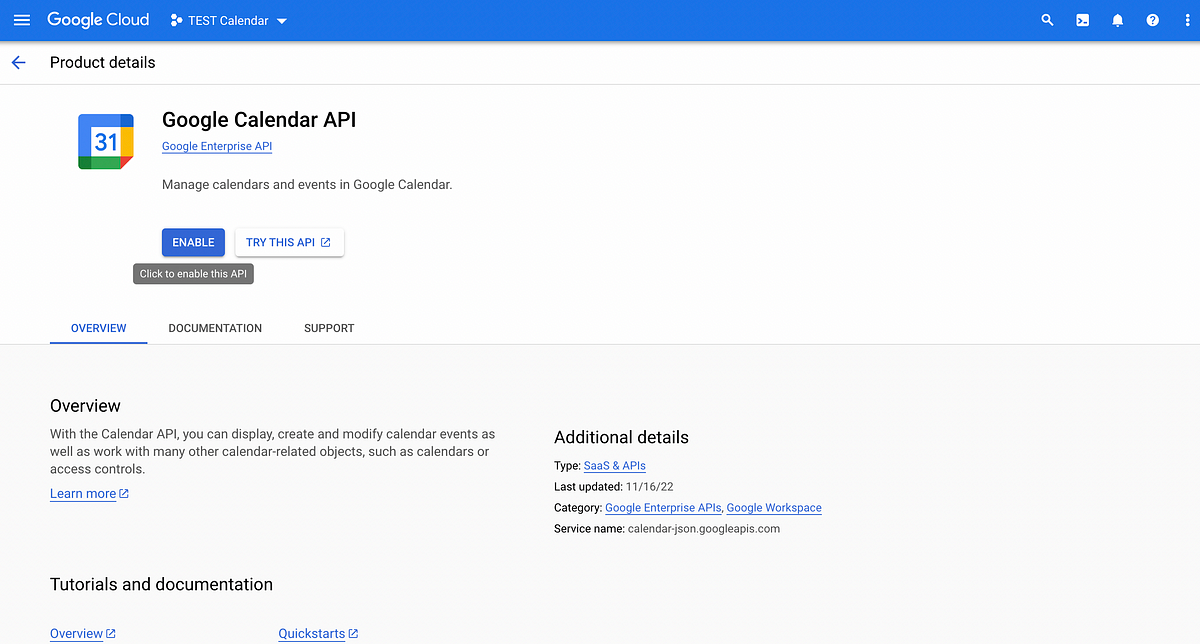
c) Now Click on the ENABLE APIS AND SERVICES option and type Calendar in the search box and select Google Calendar API. Then click on enable button to add calendar API to created project.

Step 2: Create a service account and save its credentials:
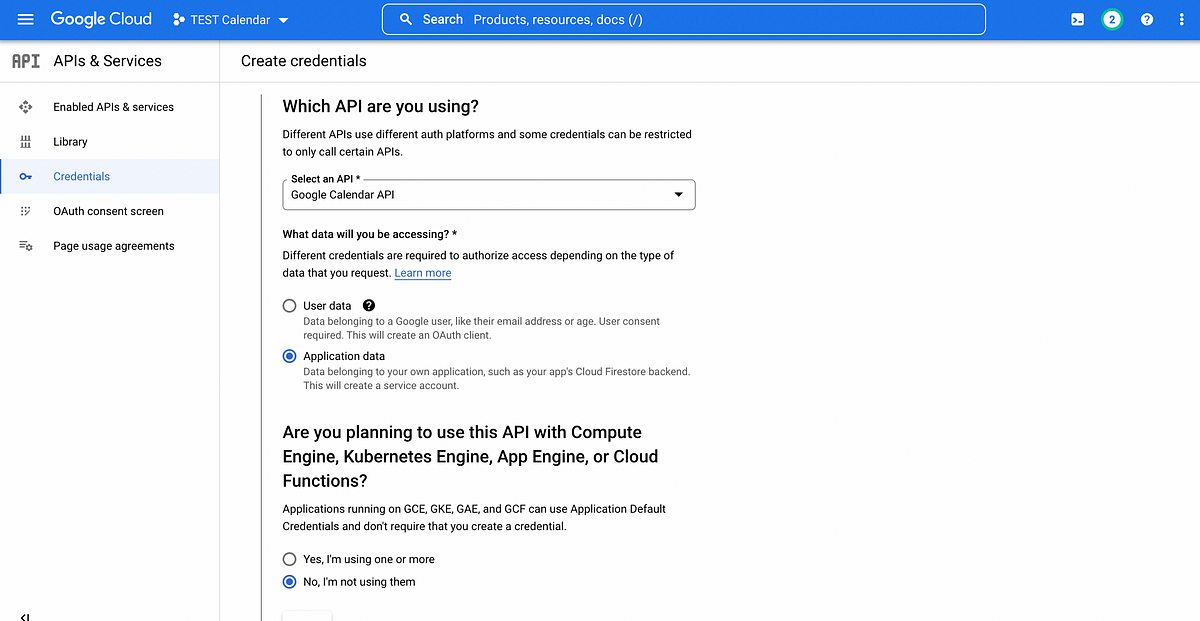
a) Click on the manage button and then on CREATE CREDENTIALS to create a service account. Select Application data under Which API are you using? question and no in the next question as shown in the image below and click next.

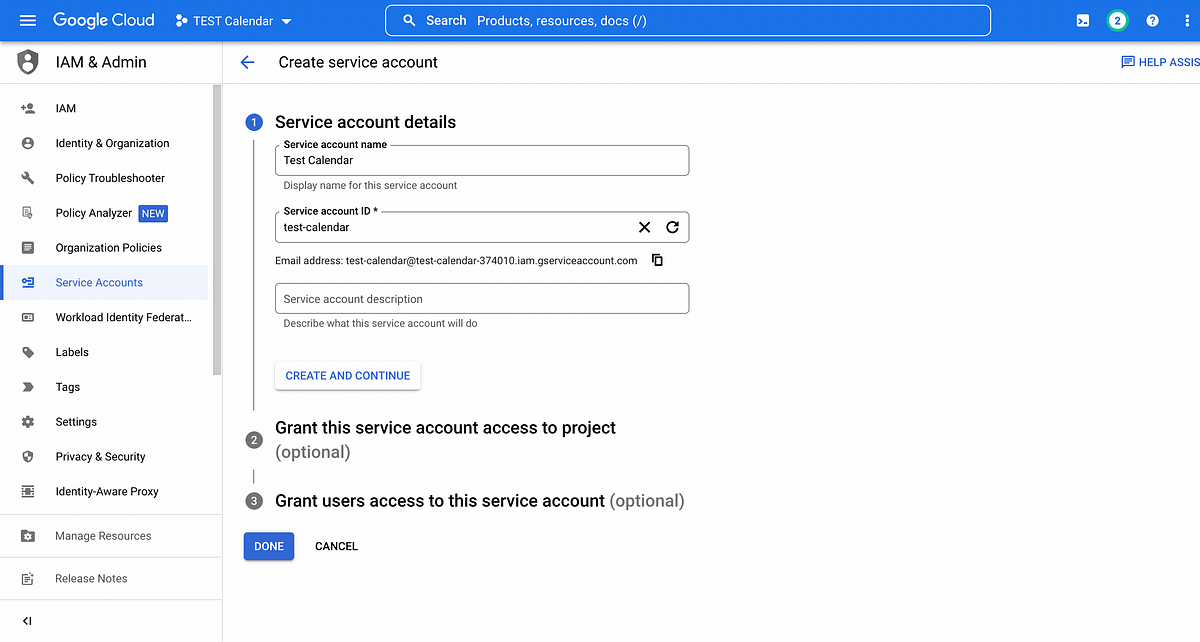
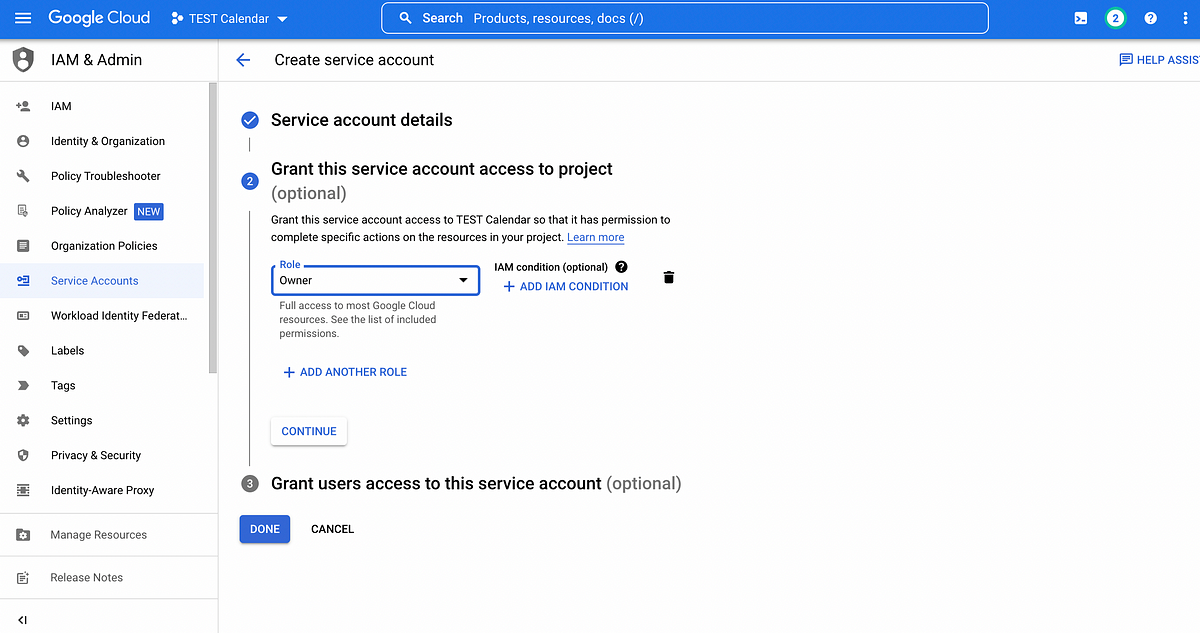
c) Now fill in the service account name and select the owner role for giving access to this service account to the project. We can skip the Grant user’s access to this service account step as it is optional and click done.
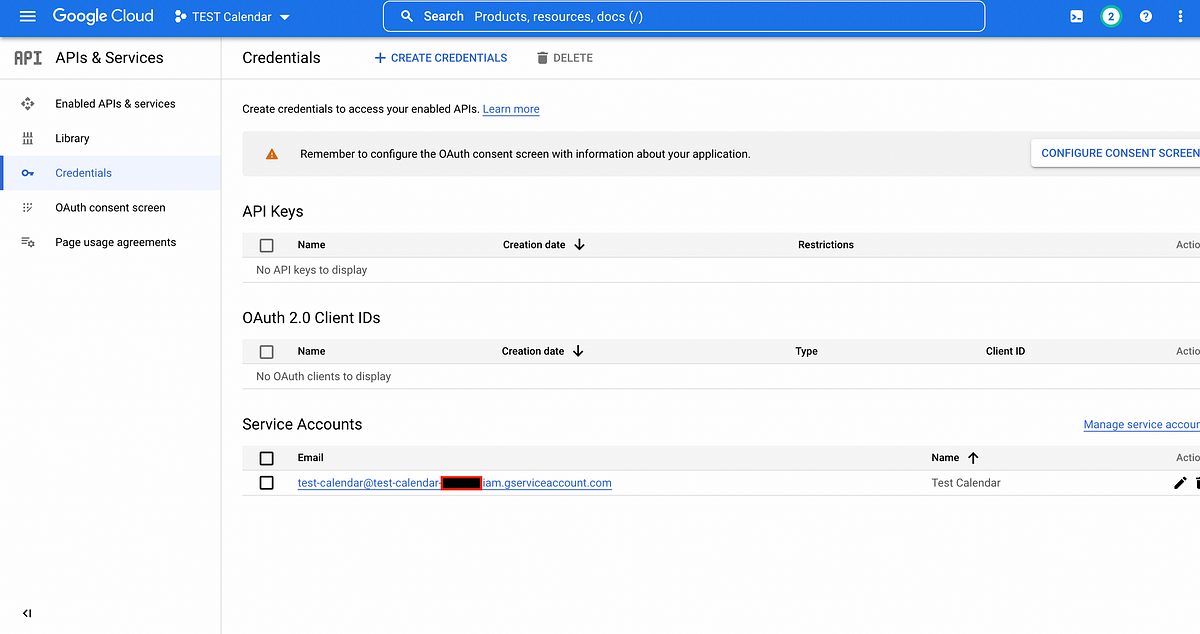
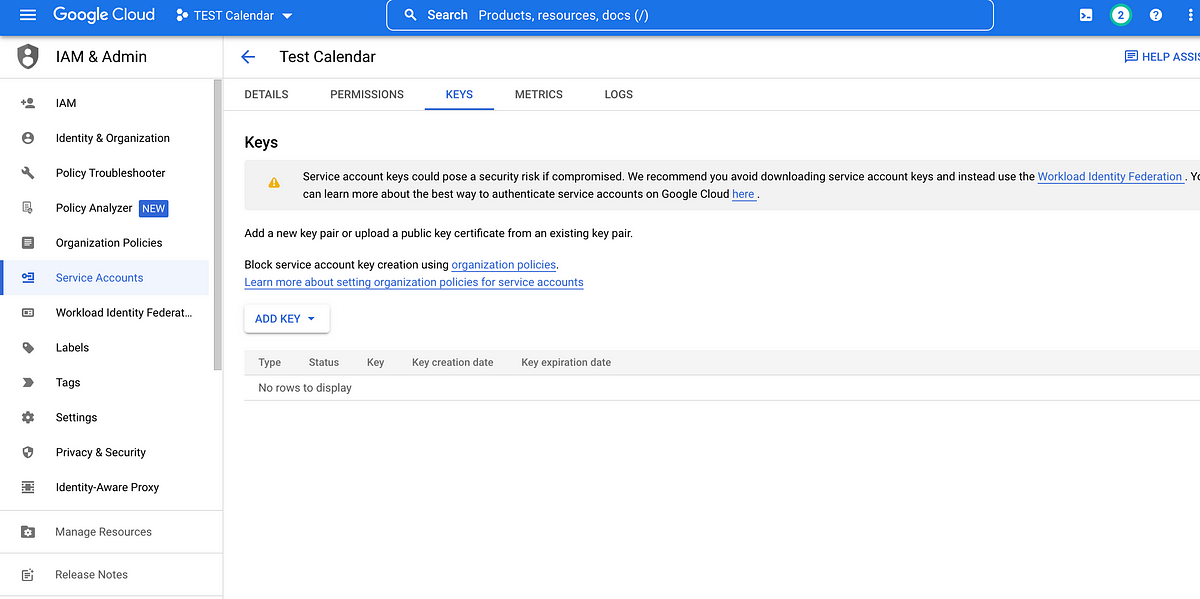
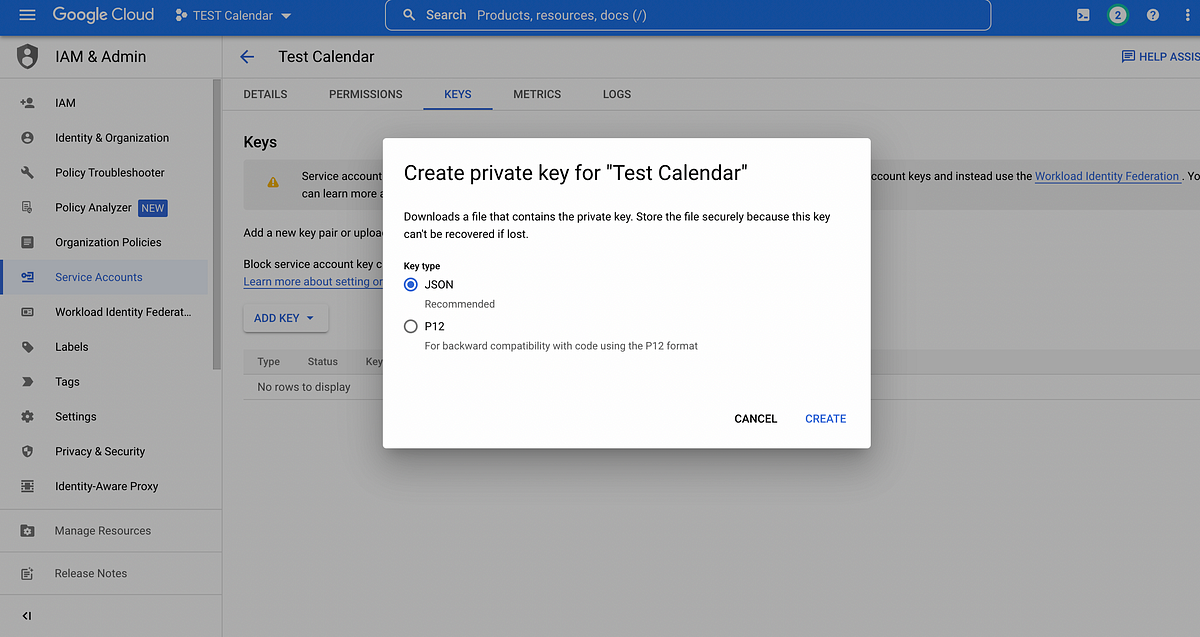
d) Now our service account has been set up. To create credentials click on the email of the service account -> KEYS tab -> ADD KEY->select JSON->create. Credentials will be created and downloaded as JSON files.
Step 3: Set up domain-wide delegation:
To access the calendar events of any employee of our organization we have to do domain wide delegation. Through domain-wide delegation, we authorize the service accounts to access users’ data without requiring each user to give consent. It allows apps to access users’ data across the organization’s Google Workspace environment. The steps for this are given below:
- Go to the Admin console of the organization.
- Then Go to Menu -> Security -> Access and data control -> API controls.
- Then click Manage Domain Wide Delegation.
- Click Add New and enter the service account client ID which will be present in the JSON file that we have downloaded when we created the service account.
- In OAuth Scopes enter https://www.googleapis.com/auth/calendar.readonly as scope because we have to retrieve only google calendar events in our case.
- In the last click Authorize.
Set up NodeJs App:
Now we will set up our node application to call google calendar API for retrieving events of users.
Run the following commands in the terminal:
- NPM INIT -Y
- NPM I GOOGLEAPIS (FOR GOOGLE APIS)
Create an index.js file. This will be the main file where we call google calendar API to fetch particular user’s events.
Step 5: Create a JWT client and call calendar API:
Paste the below code in the index.js file. In the code below we are accessing Google calendar events of user1@xyz.com of xyz organization using the above-created service account.
const { google } = require(“googleapis”); const serviceAccount = require(“./service-account-credentials.json”); (async () => { const SCOPES = “https://www.googleapis.com/auth/calendar.readonly”; const GOOGLE_PRIVATE_KEY = serviceAccount.private_key; const GOOGLE_CLIENT_EMAIL = serviceAccount.client_email; const GOOGLE_PROJECT_NUMBER = YOUR_PROJECT_NUMBER; const GOOGLE_CALENDAR_ID = “user1@xyz.com”; const SUBJECT_EMAIL = “user2@xyz.com”; const getListOfEvents = async (maxResults = 10) => { //Declaring JWT token client const jwtClient = new google.auth.JWT( GOOGLE_CLIENT_EMAIL, null, GOOGLE_PRIVATE_KEY, SCOPES, SUBJECT_EMAIL ); //Using JWT client to request to Google servers which will then return an access token. const calendar = google.calendar({ version: “v3”, project: GOOGLE_PROJECT_NUMBER, auth: jwtClient, }); //Using access token to call Google Calendar events API const eventList = await calendar.events.list({ calendarId: GOOGLE_CALENDAR_ID, timeMin: new Date().toISOString(), maxResults, singleEvents: true, orderBy: “startTime”, }); console.log( `GoogleCalendarService: getListOfEvents : ${GOOGLE_CALENDAR_ID}`, eventList.data.items ); return eventList.data; }; await getListOfEvents(); })();Code flow:
- Firstly we have to declare all required credentials from the JSON file of the service account that we have stored earlier.
- Define the scope to fetch Google calendar events as https://www.googleapis.com/auth/calendar.readonly.
- Assign previously saved project number (i.e. Project number of the project in which we have created this service account) in GOOGLE_PROJECT_NUMBER variable.
- Assign the email id of the user in GOOGLE_CLIENT_EMAIL whose google calendar events we want to access.
- SUBJECT_EMAIL will be an email of a user on behalf of whom we will be using the Google calendar so it can be any user of our organization because we have done domain-wide delegation for our company.
- Then we have to use the client’s email and private key to create a signed JWT.
- This JWT client will be then used to send the request to the Google OAuth 2.0 Authorization Server, which returns an access token.
- The application then uses the access token to access a Google API.
That’s it now we can run the above code by using the command node index.js and can fetch Google calendar events of any user of our organization.