Lets integrate Apple sign in for ios apps based on React Native

With sign in with Apple, users can essentially use their Apple ID as the trusted identifier for apps, removing the need to create a new user account with the app in question.
This article walks through the process of integrating Sign in with Apple in the context of React Native. In this we will use the package react-native-apple-authentication to facilitate integrating Sign in with Apple
Installer Package
Lets begin with installing the npm package for Apple authentication as a project dependency and running following commands to update pods.
[Command Line] npm i @invertase/react-native-apple-authentication yarn @invertase/react-native-apple-authentication [Command Line] [Command Line] cd ios and pod install [Command Line]Displaying the Sign in with Apple Button
[React-Native] import { AppleButton } from ‘@invertase/react-native-apple-authentication’; async function onAppleButtonPress() { /* Sign in logic */ } function App() { return (Utility function for apple Sign In
“onAppleButtonPress” button logic includes the following segments of code :
Sign-in Request
[React-Native] try { appleAuthRequestResponse = await appleAuth.performRequest({ requestedOperation: appleAuth.Operation.LOGIN, requestedScopes: [appleAuth.Scope.EMAIL], }); } catch (e) { console.log(‘error’, e); } const { identityToken, nonce, user, email, fullName } = appleAuthRequestResponse; [React-Native]Although other metadata is returned in appleAuthRequestResponse, such as the user’s agreed scopes, we will only be interested in the identityToken to continue authentication in this walkthrough. As we’ll see, verifying the token server-side will also return key values such as the appleUserId, that’ll enabled an identityToken to be linked to an account.
Verifying Identity Token
The last thing “onAppleButtonPress” needs to do is make that request to your server and handle either a successful or failed verification response.
[React-Native] if (identityToken) { const appleCredential = firebase.auth.AppleAuthProvider.credential( identityToken, nonce, ); console.log(‘appleCredential’, appleCredential); firebase .auth() .signInWithCredential(appleCredential) .then(user => { // User logs in Successfully // Success handler code console.log(‘apple user—-‘, user); }) .catch(error => { // Something goes wrong // Error handler code console.log(‘Error in apple login’, error); }); [React-Native]The complete Utility function for Apple sign In looks something like this –
[React-Native] import appleAuth from ‘@invertase/react-native-apple-authentication’; import firebase from ‘@react-native-firebase/app’; import { useEffect } from ‘react’; /** * appleLoginHandler function takes care of apple sign in */ const appleLoginHandler = async () => { let appleAuthRequestResponse; try { appleAuthRequestResponse = await appleAuth.performRequest({ requestedOperation: appleAuth.Operation.LOGIN, requestedScopes: [appleAuth.Scope.EMAIL], }); } catch (e) { console.log(‘error’, e); } const { identityToken, nonce, user, email, fullName } = appleAuthRequestResponse; if (identityToken) { const appleCredential = firebase.auth.AppleAuthProvider.credential( identityToken, nonce, ); console.log(‘appleCredential’, appleCredential); firebase .auth() .signInWithCredential(appleCredential) .then(user => { // User logs in Successfully console.log(‘apple user—-‘, user); }) .catch(error => { // Something goes wrong console.log(‘Error in apple login’, error); }); } }; export { appleLoginHandler }; [React-Native]Final Touch Up for Xcode and Firebase setup –
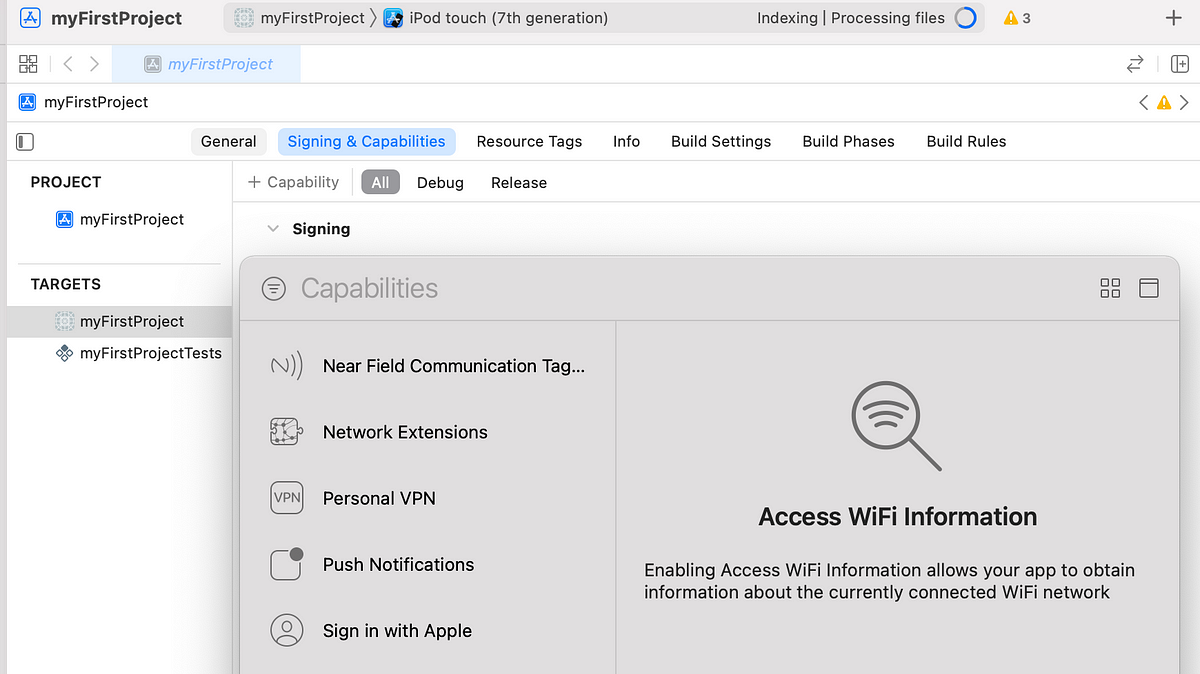
XCODE –
Open your project >> under Signing & Capabilities >> add Capability >> Enable Sign in With Apple

Firebase –
Open your current app in firebase >> Under Authentication >> Sign-In-Methods >> Add new Provider >> Enable Apple login

Great!! now we can Login in our App through Apple login.
Note: In simulator you might face error code 1001 that might not be an issue in real device.
