Geolocation is the process of determining the geographic location of a device, such as a smartphone or a laptop, using GPS, Wi-Fi, or other data. React Native is a popular framework for building mobile apps using JavaScript and React. In this article, we’ll discuss how to access geolocation data in a React Native app.
In this article, we will discuss how to request location permission in React Native for Android.
Installation
The React Native geolocation API is provided by the react-native-geolocation-service library. This library provides access to the device’s GPS, allowing you to determine the device’s latitude and longitude coordinates. To use this library in your React Native app, you will first need to install it using npm or yarn.
yarn
yarn add react-native-geolocation-service
npm
npm install react-native-geolocation-service
We also want to make sure that we enable permissions in the app by adding the following code to android/src/main/AndroidManifest.xml:
Requesting Permission:
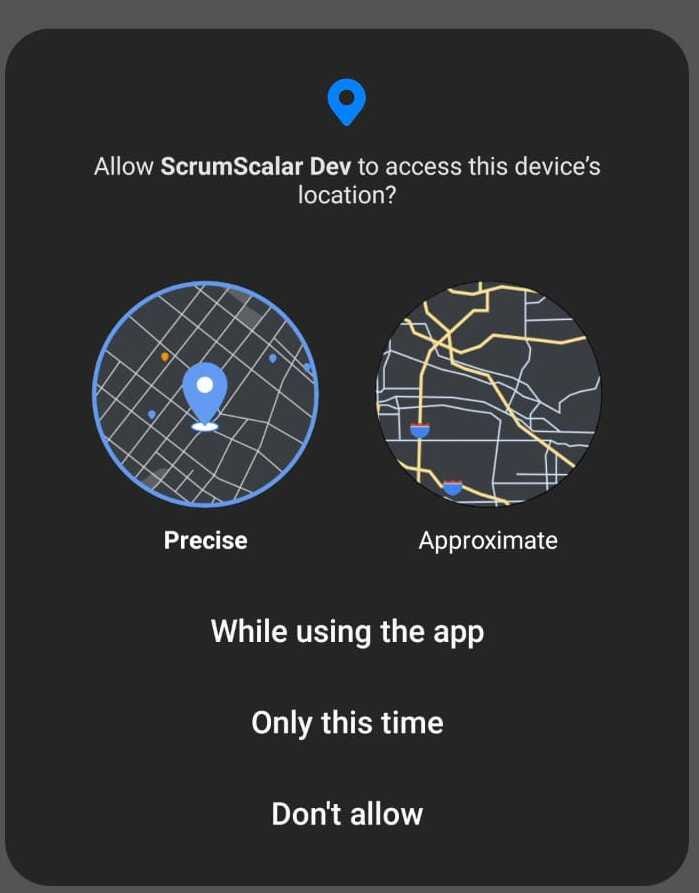
Now that we know the platform, we can request location permission. On Android, we can use the requestPermission method from the PermissionsAndroid library to request permission. This method takes two arguments: the permission to request and a message to display to the user explaining why the permission is necessary.
import Geolocation from '@react-native-community/geolocation';

Geolocation.getCurrentPosition(
  position => {
    console.log(position);
  },
  error => console.log(error),
  { enableHighAccuracy: true, timeout: 20000, maximumAge: 1000 }
);
Checking the Result
After requesting permission, we need to check the result to see if the permission was granted or denied. We can do this by checking the value of the granted variable.
if (granted === PermissionsAndroid.RESULTS.GRANTED) {
    console.log('You can use the location');
    return true;
  } else {
    console.log('Location permission denied');
    return false;
  }
Here, is a full example of requesting location permission.
const requestPermission = async () => {
  try {
    const granted = await PermissionsAndroid.request(
      PermissionsAndroid.PERMISSIONS.ACCESS_FINE_LOCATION,
      {
        title: 'Location Permission',
        message: 'This app needs access to your location',
        buttonNeutral: 'Ask Me Later',
        buttonNegative: 'Cancel',
        buttonPositive: 'OK',
      },
    );
    if (granted === PermissionsAndroid.RESULTS.GRANTED) {
      console.log('You can use the location');
      return true;
    } else {
      console.log('Location permission denied');
      return false;
    }
  } catch (err) {
    console.warn(err);
  }
};
Use the useEffect hook to check for permission when the component mounts:
const MyComponent = () => {
  const [permission, setPermission] = useState(false);

  useEffect(() => {
    const getPermission = async () => {
      const hasPermission = await checkPermission();
      if (!hasPermission) {
        const permissionGranted = await requestPermission();
        setPermission(permissionGranted);
      } else {
        setPermission(true);
      }
    };
    getPermission();
  }, []);

  return (
    <View>
      {permission ? (
        <Text>Location Permission Granted</Text>
      ) : (
        <Text>Location Permission Not Granted</Text>
      )}
    </View>
  );
};
You can access the device’s geolocation data using the following code:
Now, from inside our component, we’ll create a state to track our users’ location. First, be sure that you imported useState from React:
import Geolocation from '@react-native-community/geolocation';

Geolocation.getCurrentPosition(
  position => {
    console.log(position);
    setLocation(position);
  },
    error => {
            console.log(error.code, error.message);
            setLocation(false);
          },
  { enableHighAccuracy: true, timeout: 20000, maximumAge: 1000 }
);
The getCurrentPosition the method takes three arguments: a success callback, an error callback, and an options object. The success callback is called with the device’s current position, which includes its latitude and longitude coordinates. The error callback is called if there is an error retrieving the device’s location. The options object allows you to customize the behavior of the geolocation API, such as setting the desired accuracy, timeout, and maximum age of the location data.
In conclusion, the react-native-geolocation-service The library makes it easy to access geolocation data in a React Native app. By using this library, you can build mobile apps that take advantage of the device’s GPS to provide location-based services to users.